Creating a Streamlit User Interface for AutoGen Agents
Introduction
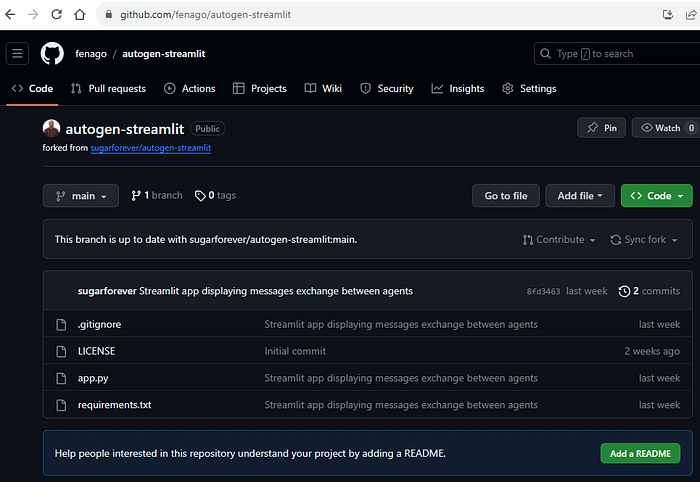
In the field of artificial intelligence, AutoGen stands out as a framework designed to leverage and maximize the capabilities of LLMs, such as GPT-4. Developed by Microsoft Research, AutoGen simplifies the creation of complex, multi-agent LLM-based applications by providing a means to automate, optimize, and orchestrate workflows that were previously labor-intensive and complex1. When you think of AutoGen — just imagine that instead of talking to 1 GPT — you can converse with many. Each GPT is it’s own “agent” and serves a special role in an overarching business process. Here is the code: https://github.com/fenago/autogen-streamlit
and
Here is the app:
Remember that this is a POC and it does require some fine tuning… it is rough. Be warned! But it should provide a good launching pad for creating simple UIs for AutoGen agents. Type in TERMINATE to end the processing.
Makes sure that the prompt specifically asks for code not to run or files to be stored locally since this is a streamlit limitation — not an AutoGen limitation.


Understanding AutoGen
Before we dive into the UI creation, let’s understand what AutoGen is.
It is a transformative framework that enables next-generation LLM applications by:
- Automating Workflows: AutoGen automates the LLM workflows, which is crucial as developers craft increasingly intricate LLM-based applications.
- Creating Conversable Agents: It provides customizable agents that can conduct automated conversations, not just with users but also among themselves.
- Integrating with Tools and Humans: AutoGen agents can incorporate a mix of LLMs, human input, and other tools to overcome the limitations of each component alone.
- Facilitating Complex Tasks: Whether it’s code generation, execution, debugging, or complex task solving, AutoGen agents can handle a variety of advanced operations.
Why Streamlit Cloud?
Streamlit Cloud is an ideal platform for creating UIs for AutoGen agents due to its ease of use and ability to rapidly deploy and share applications. It supports quick prototyping and has a thriving community contributing to its extensive component library.
In the following sections, we will outline the steps to create a UI for AutoGen agents using Streamlit Cloud. We will define the necessary components, layout the UI, and integrate the AutoGen agents, ensuring you can build a system with a seamless user experience that harnesses the full potential of advanced LLMs.
Setup Your Streamlit Cloud Environment
- Prepare Your GitHub Repository:
- Ensure you have a GitHub account. If not, create one.
- Make a new repository and name it appropriately (e.g.,
autogen-chat-ui). - In the repository, create a file named
app.pyand paste the given code into this file. - Add a
requirements.txtfile that lists all the packages needed to run your app, such asstreamlit,autogen,asyncio, and any other dependencies.
Here is your requirements.txt file:
aiohttp==3.8.6
aiosignal==1.3.1
altair==5.1.2
async-timeout==4.0.3
attrs==23.1.0
blinker==1.6.3
cachetools==5.3.2
certifi==2023.7.22
charset-normalizer==3.3.1
click==8.1.7
diskcache==5.6.3
docker==6.1.3
FLAML==2.1.1
frozenlist==1.4.0
gitdb==4.0.11
GitPython==3.1.40
idna==3.4
importlib-metadata==6.8.0
Jinja2==3.1.2
jsonschema==4.19.1
jsonschema-specifications==2023.7.1
markdown-it-py==3.0.0
MarkupSafe==2.1.3
mdurl==0.1.2
multidict==6.0.4
numpy==1.26.1
openai==0.28.1
packaging==23.2
pandas==2.1.2
Pillow==10.1.0
protobuf==4.24.4
pyarrow==13.0.0
pyautogen==0.1.13
pydeck==0.8.1b0
Pygments==2.16.1
python-dateutil==2.8.2
python-dotenv==1.0.0
pytz==2023.3.post1
referencing==0.30.2
requests==2.31.0
rich==13.6.0
rpds-py==0.10.6
six==1.16.0
smmap==5.0.1
streamlit==1.28.0
tenacity==8.2.3
termcolor==2.3.0
toml==0.10.2
toolz==0.12.0
tornado==6.3.3
tqdm==4.66.1
typing_extensions==4.8.0
tzdata==2023.3
tzlocal==5.2
urllib3==2.0.7
validators==0.22.0
websocket-client==1.6.4
yarl==1.9.2
zipp==3.17.0- Connect to Streamlit Cloud:
- Go to Streamlit Cloud and sign in with your GitHub account.
- Navigate to the ‘New app’ section and select your GitHub repository.
- Choose the branch where your code is and ensure that the path to your
app.pyis correct. - Click ‘Deploy’ to deploy your app. Streamlit Cloud will automatically install the dependencies from
requirements.txtand launch your app.
app.py (in your GitHub)
Step 1: Import Dependencies
Start your app.py with the necessary imports:
import streamlit as st
import asyncio
from autogen import AssistantAgent, UserProxyAgentstreamlitis used for creating the UI.asynciois necessary for asynchronous control flow, allowing the chat to be responsive.autogenprovides the classes for the chat agents.
Step 2: Create the Streamlit Interface
Set up the title of your app using Streamlit’s write function:
st.write("# AutoGen Chat Agents")This line will display the header “AutoGen Chat Agents” at the top of your UI.
Step 3: Define Custom Agent Classes
Create custom agent classes that extend AutoGen’s AssistantAgent and UserProxyAgent:
class TrackableAssistantAgent(AssistantAgent):
    def _process_received_message(self, message, sender, silent):
        with st.chat_message(sender.name):
            st.markdown(message)
        return super()._process_received_message(message, sender, silent)

class TrackableUserProxyAgent(UserProxyAgent):
    def _process_received_message(self, message, sender, silent):
        with st.chat_message(sender.name):
            st.markdown(message)
        return super()._process_received_message(message, sender, silent)
These classes override a method to display received messages in the Streamlit chat widget, providing real-time updates to the user.
Step 4: Configure the OpenAI Model and API Key
Use Streamlit’s sidebar feature for configuration:
selected_model = None
selected_key = None

with st.sidebar:
    st.header("OpenAI Configuration")
    selected_model = st.selectbox("Model", ['gpt-3.5-turbo', 'gpt-4'], index=1)
    selected_key = st.text_input("API Key", type="password")
Here, users can select the model version and input their OpenAI API key securely.
Step 5: Set Up Chat Interaction
Create the main chat interface and handle the input:
with st.container():
    # for message in st.session_state["messages"]:
    #    st.markdown(message)

    user_input = st.chat_input("Type something...")
    if user_input:
        if not selected_key or not selected_model:
            st.warning(
                'You must provide valid OpenAI API key and choose preferred model', icon="⚠️")
            st.stop()

        llm_config = {
            "request_timeout": 600,
            "config_list": [
                {
                    "model": selected_model,
                    "api_key": selected_key
                }
            ]
        }
This section creates a chat input field and displays a warning if the user hasn’t completed the configuration.
Step 6: Configure the Agents
Define the settings for your agents and set up the event loop for asynchronous chat:
        # create an AssistantAgent instance named "assistant"
        assistant = TrackableAssistantAgent(
            name="assistant", llm_config=llm_config)

        # create a UserProxyAgent instance named "user"
        user_proxy = TrackableUserProxyAgent(
            name="user", human_input_mode="NEVER", llm_config=llm_config)

        # Create an event loop
        loop = asyncio.new_event_loop()
        asyncio.set_event_loop(loop)
This configures your custom agents with the selected model and API key and prepares the application to handle asynchronous operations.
Step 7: Initiate the Chat
Finally, define and run the asynchronous function to start the chat:
# Define an asynchronous function
        async def initiate_chat():
            await user_proxy.a_initiate_chat(
                assistant,
                message=user_input,
            )

        # Run the asynchronous function within the event loop
        loop.run_until_complete(initiate_chat())
When a user sends a message, this function initiates a chat between the user proxy agent and the assistant agent.
To deploy this app on Streamlit Cloud, ensure you have app.py and requirements.txt files committed to your GitHub repository. Then, link your GitHub to Streamlit Cloud, select the repository, and deploy the app. Streamlit Cloud will install dependencies from requirements.txt and host your app.
For further understanding and information on AutoGen, you can refer to Microsoft’s AutoGen Blog Post. For more details on Streamlit, check out the official Streamlit documentation.
In conclusion, integrating AutoGen agents into a Streamlit application unlocks a myriad of possibilities for creating interactive and intelligent UIs powered by large language models. By following the steps outlined in this tutorial, you can establish a responsive chat interface that leverages the advanced capabilities of AutoGen’s conversational agents. Whether your end goal is to build a sophisticated chatbot, an automated helpdesk, or a personalized assistant, the combination of AutoGen and Streamlit provides a robust and developer-friendly pathway to realize your vision. Embrace this guide as a springboard into the exciting realm of conversational AI interfaces, and let your creativity guide you towards innovative applications.
To explore the capabilities of AutoGen agents in a live environment and experience the conversational AI you’ve just read about, you can try the application at this link.
Special thanks to 01coder for the comprehensive article on developing multi-agent applications with Streamlit and AutoGen. For a deeper dive and more context on this topic, be sure to read their insightful piece on Medium, titled “Streamlit AutoGen Multi-Agents Application Development.” It’s an excellent resource for anyone looking to further their knowledge in AI-driven application development.