How to Run AgentGPT and AutoGPT in Gitpod in 5 Minutes
Introduction:
AgentGPT is an open-source project that allows you to configure and deploy autonomous AI agents in your browser, leveraging the power of OpenAI’s GPT model. By simply stating your goal, AgentGPT will “think” through a plan and execute it by generating optimized prompts, enabling the AI to produce the best possible results. In this tutorial, you will learn how to set up and run AgentGPT with a user-friendly interface in Gitpod, an online IDE for GitHub that provides ready-to-code development environments. The best part? You can have AgentGPT up and running, for free, in just 5 minutes!
Step 1: Fork the AgentGPT Repository
Visit the main AgentGPT repository at https://github.com/reworkd/AgentGPT, and click the “Fork” button in the upper right corner to create a fork of the project in your GitHub account.

This is my forked directory:

Step 2: Open Your Forked AgentGPT in Gitpod
To create a Gitpod workspace for your forked AgentGPT repository, prefix the GitHub URL of the project with gitpod.io/#. Replace YOUR_USERNAME with your GitHub username:
gitpod.io/#https://github.com/YOUR_USERNAME/AgentGPTVisit this URL (obviously replace YOUR_USERNAME), and Gitpod will ask for permission to access your GitHub account. Grant access, and Gitpod will automatically create a new workspace for AgentGPT.

Step 3: Update environment variables
Update the .env file in the root directory of the project. Make sure to add your OpenAI API key to the .env file. The file is named .env.example so you will obviously need to rename it to .env.

Step 4: Run the useSqlite.sh script
Open a terminal in your Gitpod environment, and run the following command to execute the useSqlite.sh script and update the Prisma schema:
./prisma/useSqlite.sh
The script will replace “mysql” and “postgres” with “sqlite” and remove the “@db.Text” decorator in the schema.prisma file.
Step 5: Install dependencies and set up the database
In the terminal, run the following commands to install dependencies and set up the SQLite database:
npm install
npx prisma db push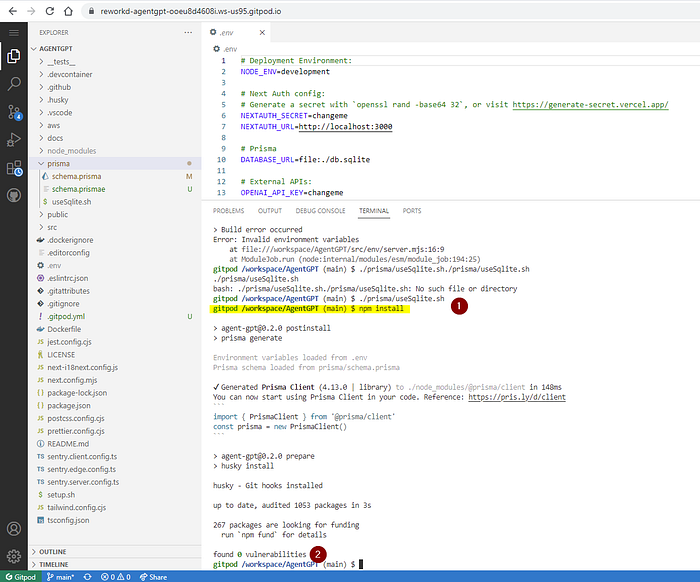

Step 6: Run AgentGPT
Now that everything is set up, run AgentGPT with the following command in the terminal:
npm run dev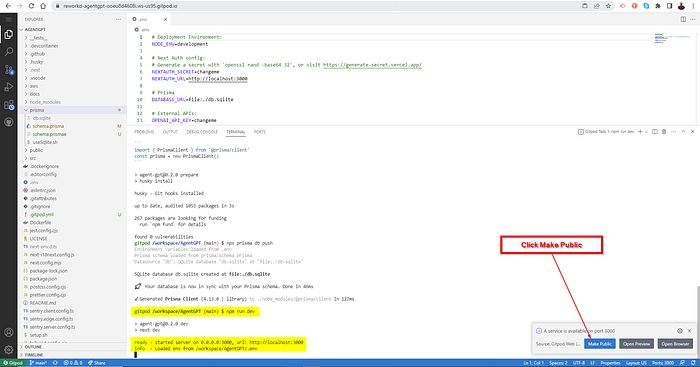
AgentGPT will start running, and Gitpod will display the URL where the application is running.
Step 7: Expose the AgentGPT GUI in Gitpod
Once AgentGPT is running, you’ll see a message in the terminal with the following information:
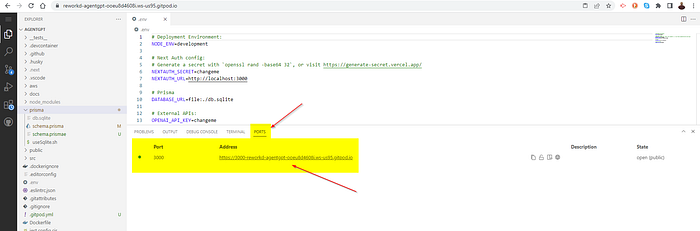
Server started on port 3000Click on the “Ports” tab in the lower part of the Gitpod sidebar (next to the “Terminal” tab).
Find the port 3000 in the list and click on the “Open Browser” button next to it.
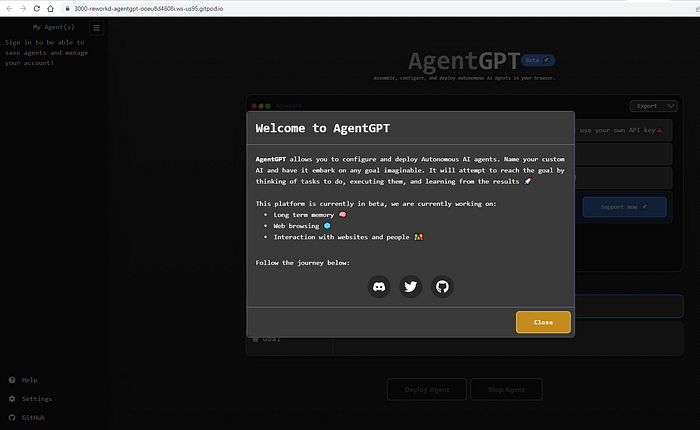
Congratulations! You’ve successfully set up and run AgentGPT in Gitpod. The AgentGPT GUI should now be accessible from within your Gitpod environment, where you can create and manage custom AI agents.

Conclusion:
With Gitpod, you can quickly set up and run the AgentGPT project without having to configure your local environment. In just a few minutes, you can start experimenting with autonomous AI agents using AgentGPT’s easy-to-use graphical interface.